ORVESTRA · WIKI
IoT - weekly schedules
1. Add or open a schedule
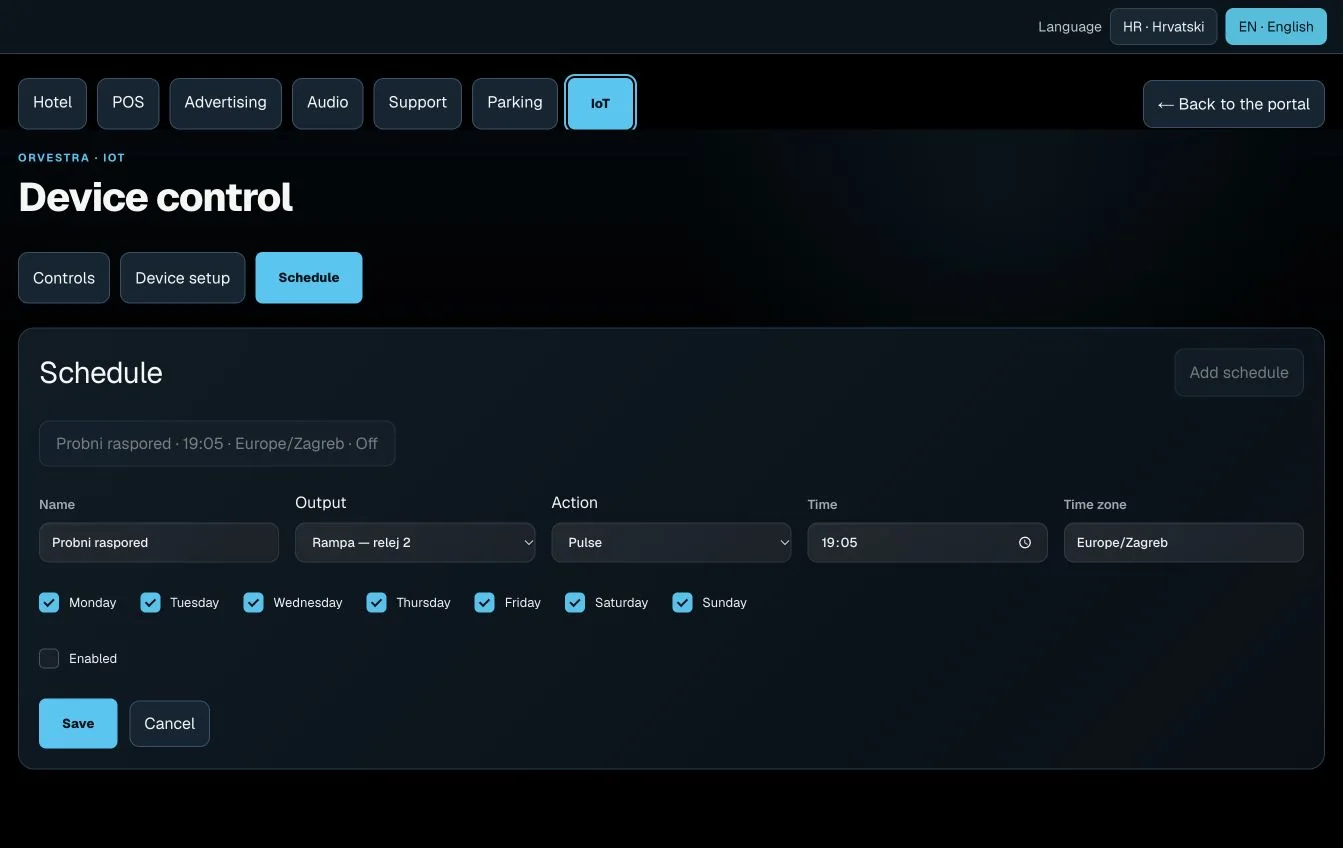
Open IoT > Schedule and choose Add schedule. To edit an existing schedule, select its name. The name describes the task; it is not a button that immediately activates a relay.
2. Select the output and time
Choose Output, then Action: Pulse for a pulse output, or ON / OFF for a continuous output. Set Time, Time zone (for example Europe/Zagreb) and the weekdays. Select Enabled and Save. To switch on at 18:00 and off at 23:00, create two separate schedules for the same output.
3. Disable or cancel
To temporarily disable a schedule, open it, clear Enabled and save. Cancel closes edits without saving. Check the output name and time zone before enabling it.
Behaviour during an outage
Schedules run centrally on the server, not on the board itself. Missed actions while unavailable are not replayed later. After reconnection, check the output and set its state manually if needed. New or edited schedules apply to future occurrences; a repeated daylight-saving hour does not execute the same local occurrence twice.